
Caladiums are a popular choice for gardeners and plant enthusiasts alike due to their vibrant foliage and easy maintenance. Propagating caladiums is a great way to multiply your collection and share these beautiful plants with others. In this complete guide to propagating caladium, readers will learn everything they need to know to successfully propagate these plants.
Propagation can be done through several methods, including division, cuttings, and seeds. Each method has its own advantages and challenges, and readers will learn how to choose the best method for their situation. They will also learn about the ideal conditions for propagation, including temperature, humidity, and soil type. With this guide, readers will be able to confidently propagate their caladiums and enjoy a thriving collection of these stunning plants.
Table of Contents
Understanding Caladiums
Caladiums are tropical perennials that belong to the caladium family. They are known for their heart-shaped leaves and are commonly referred to as “angel wings” or “elephant ears.” These foliage plants are popular as houseplants and are often grown indoors.
Caladiums are native to the tropics and require warm temperatures and high humidity to thrive. They grow best in well-draining soil and prefer partial shade. Direct sunlight can scorch their leaves, so it’s important to provide them with some shade.
There are many different varieties of caladiums, each with its own unique color and pattern. Some of the most popular varieties include:
- Candidum: This variety has white leaves with green veins.
- Fannie Munson: This variety has pink leaves with green veins.
- Red Flash: This variety has red leaves with green veins.
When propagating caladiums, it’s important to keep in mind that they are slow-growing plants. It can take several months for a cutting to develop roots and begin to grow. Patience is key when propagating caladiums.
Overall, caladiums are beautiful and unique plants that can add a touch of tropical flair to any indoor space. With the right care and attention, they can thrive and bring joy for years to come.
Ideal Conditions for Caladiums
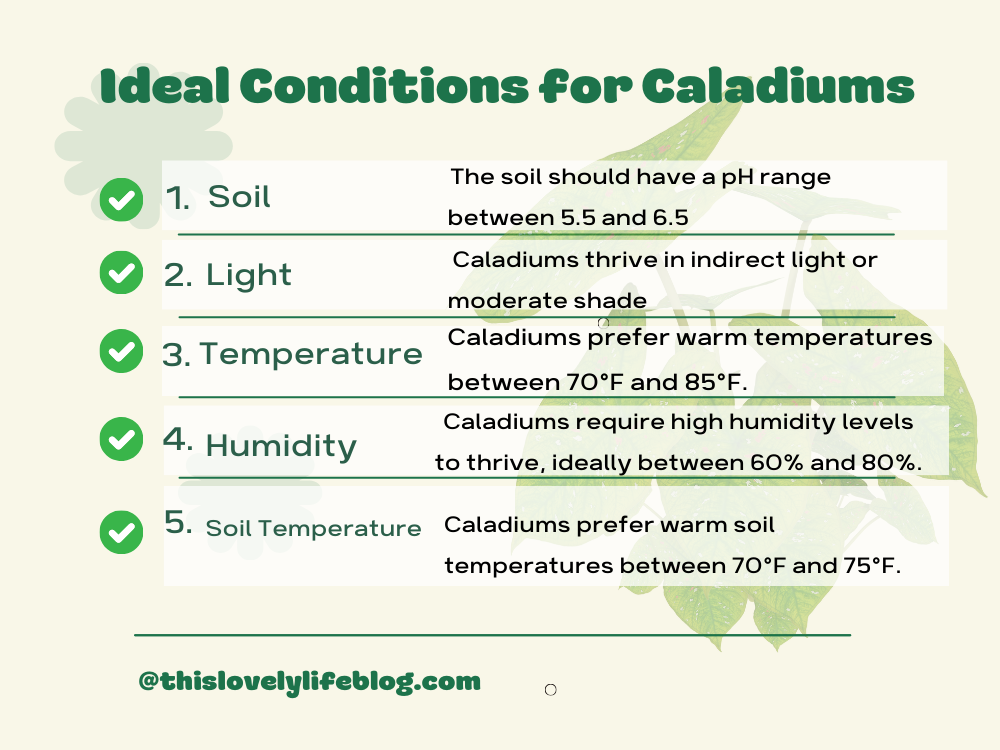
Caladiums require specific conditions to thrive and propagate successfully. Here are the ideal conditions for cultivating healthy caladium plants:
Soil
Caladiums prefer rich, well-drained soil that is moist but not waterlogged. The soil should have a pH range between 5.5 and 6.5, which is slightly acidic. Adding organic matter such as compost or peat moss to the soil can help improve its nutrient content and drainage.
Light
Caladiums thrive in indirect light or moderate shade. They can also tolerate full sun if they are provided with enough moisture. Avoid exposing them to direct sunlight, as it can scorch their delicate leaves.
Temperature
Caladiums prefer warm temperatures between 70°F and 85°F. They can tolerate cooler temperatures, but they may become dormant and stop growing during the winter months.
Humidity
Caladiums require high humidity levels to thrive, ideally between 60% and 80%. If the air is too dry, their leaves may dry out and turn brown. You can increase humidity levels by misting the leaves with water or placing a humidifier nearby.
Soil Temperature
Caladiums prefer warm soil temperatures between 70°F and 75°F. If the soil is too cold, they may not grow well and could become susceptible to diseases.
By providing the ideal conditions for caladiums, you can ensure that they grow and propagate successfully.
Propagation Methods
Caladiums can be propagated using two primary methods: division and stem cuttings. Both methods are relatively easy and can be performed with minimal tools and supplies.
Division Method
The division method involves separating the tuber into smaller sections, each with at least one bud or eye. The process is best done in the spring when the plant is actively growing. Here are the steps to follow:
- Carefully dig up the entire plant, being careful not to damage the tubers.
- Gently shake off any excess soil and remove any dead or damaged leaves.
- Use a sharp, sterile knife to cut the tuber into sections, each with at least one bud or eye.
- Dust the cut edges with a rooting hormone to encourage new root growth.
- Plant each section in a well-draining soil mix, with the bud or eye facing up.
Stem Cuttings
Stem cuttings are another effective way to propagate caladiums. This method involves taking a cutting from the stem of the plant and rooting it in soil or water. Here are the steps to follow:
- Choose a healthy stem and make a clean cut just below a node.
- Remove any leaves from the bottom half of the stem.
- Dip the cut end of the stem in rooting hormone.
- Plant the stem cutting in a well-draining soil mix or place it in a jar of water.
- Keep the soil or water moist and place the cutting in a bright, indirect light.
Both propagation methods can be successful with proper care and attention. Division is typically the preferred method for larger plants, while stem cuttings are ideal for smaller plants or when only a few new plants are desired.
Preparing for Propagation
Before propagating caladium, it is important to properly prepare the tools and materials needed for the process. This ensures that the propagation process is successful and that the new plants are healthy.
Firstly, it is important to obtain healthy tubers or bulbs from mature caladium plants. Look for bulbs that are firm and free from any signs of damage or disease. The bulbs should also have eyes, which are small bumps on the surface of the bulb where new shoots will emerge.
Next, prepare the tools needed for propagation. Sharp shears or scissors are necessary for cutting the tubers or bulbs into smaller pieces. It is important to use sterile tools to prevent the spread of disease. Disinfect the shears or scissors with rubbing alcohol or a solution of one part bleach and nine parts water before use.
When handling the tubers or bulbs, it is recommended to wear gloves to prevent any damage to the plants and to protect the hands from any irritants or toxins that may be present.
Once the tools and materials are prepared, the next step is to cut the tubers or bulbs into smaller pieces. Each piece should have at least one eye and be about the size of a golf ball. Larger tubers or bulbs can be cut into multiple pieces, as long as each piece has an eye.
In summary, preparing for caladium propagation involves obtaining healthy tubers or bulbs, preparing sterile tools, and cutting the tubers or bulbs into smaller pieces with at least one eye. By following these steps, the propagation process can be successful and result in healthy new plants.
The Propagation Process
Propagating caladium is a straightforward process that involves several steps. It’s important to start the process in the spring, as this is the best time to plant new caladiums. The propagation process begins with selecting a healthy mother plant from which to take cuttings.
Next, prepare fresh soil by mixing potting soil and compost in equal parts. Fill pots with the fresh soil, making sure to leave enough room for the cuttings. Create holes in the soil with a pencil or your finger, and place the cuttings in the holes.
Ensure that the pots have good drainage by adding holes to the bottom. Place the pots in a plastic bag to create a humid environment for germination. Keep the pots in a warm, bright location, but out of direct sunlight.
After a few weeks, the cuttings should start to grow roots. Once the roots are established, remove the plastic bag and move the pots to a location with bright, indirect sunlight. Water the plants regularly, but avoid over-watering as this can lead to root rot.
In conclusion, propagating caladium is a simple process that requires a healthy mother plant, fresh soil, pots with good drainage, and a humid environment for germination. With proper care and attention, new caladium plants can be easily grown from cuttings.
Post-Propagation Care
After successfully propagating caladium, it’s essential to take proper care of the new plants to ensure they thrive. Here are some tips for post-propagation care:
Watering
Caladiums require consistent moisture, but overwatering can lead to root rot. Water the plants when the top inch of soil feels dry to the touch. During the growing season, caladiums may need to be watered twice a week, while in the dormant season, they may only need water once a week.
Fertilizing
Fertilizing caladiums can help promote healthy growth and vibrant foliage. Use a slow-release fertilizer or liquid fertilizer every four to six weeks during the growing season. Avoid fertilizing during the dormant season.
Mulching
Mulching can help retain moisture and regulate soil temperature, which is especially important during hot summer months. Apply a layer of mulch around the base of the plants, taking care not to cover the stems or leaves.
Sunlight
Caladiums prefer bright, indirect light. Too much direct sunlight can scorch the leaves, while too little light can cause the plants to become leggy. During the growing season, place the plants in a location that receives filtered or dappled sunlight.
Seasonal Care
In the summer, caladiums may benefit from a periodic misting to increase humidity levels. In the autumn, reduce watering and allow the plants to enter dormancy. During the dormant season, store the bulbs in a cool, dry location until the following growing season.
By following these post-propagation care tips, gardeners can enjoy healthy, vibrant caladium plants year after year.
Potential Problems and Solutions
As with any plant, caladiums are susceptible to a few potential problems. However, with proper care and attention, these issues can be easily prevented or resolved.
Rot
One common problem with caladiums is rot. This can occur when the plant is overwatered or if the soil does not drain properly. Signs of rot include mushy or discolored leaves, and a foul smell coming from the soil.
To prevent rot, make sure to plant your caladiums in well-draining soil and avoid overwatering. If you notice signs of rot, remove the affected leaves and adjust your watering schedule accordingly.
Pests
Caladiums are also vulnerable to pests such as spider mites, aphids, and mealybugs. These pests can cause damage to the leaves and weaken the plant over time.
To prevent pest infestations, regularly inspect your caladiums for signs of damage or pests. If you notice an infestation, treat the plant with an appropriate insecticide or insecticidal soap.
Toxicity
While caladiums are beautiful, they are also toxic to both humans and pets. The leaves and stems of the plant contain calcium oxalate crystals, which can cause irritation and swelling if ingested.
To prevent accidental ingestion, keep your caladiums out of reach of children and pets. If you do come into contact with the plant, wash your hands thoroughly and avoid touching your face.
Zed
Finally, caladiums may be susceptible to zed. This refers to a condition where the plant fails to grow or produce leaves. This can occur if the plant is not receiving enough light or if the soil is not providing the necessary nutrients.
To prevent zed, make sure your caladiums are planted in an area that receives adequate sunlight and that the soil is enriched with the appropriate nutrients. If you notice signs of zed, adjust your care routine accordingly.
Varieties of Caladiums
Caladiums come in a variety of colors, patterns, and sizes. Some of the popular varieties of Caladiums are:
- Red Caladiums: These Caladiums have bright red leaves and are perfect for adding a pop of color to your garden. Some popular varieties include Red Flash, Scarlet Flame, and Red Belly.
- White Caladiums: These Caladiums have white leaves with green veins and are great for brightening up shady areas. Some popular varieties include Candidum, Moonlight, and White Christmas.
- Green Caladiums: These Caladiums have green leaves and are perfect for adding a touch of freshness to your garden. Some popular varieties include Green Acres, Emerald Beauty, and Green Ice.
- Pink Caladiums: These Caladiums have pink leaves and are great for adding a feminine touch to your garden. Some popular varieties include Pink Beauty, Pink Symphony, and Pink Splash.
- Patterned Caladiums: These Caladiums have leaves with unique patterns and are great for adding a bit of variety to your garden. Some popular varieties include Fannie Munson, Carolyn Whorton, and Florida Sweetheart.
Caladiums do not produce buds or flowers as they are grown for their colorful foliage. They are typically grown as annuals but can be grown as perennials in warmer climates.
Overall, there is a Caladium variety for every garden and preference.
Incorporating Caladiums in Your Garden
Caladiums are an excellent addition to any garden due to their vibrant and colorful foliage. These plants are versatile and can be used in a variety of ways to enhance the beauty of your garden. Here are some tips on how to incorporate caladiums in your garden:
Garden Beds
Caladiums are perfect for adding color and texture to garden beds. They can be planted in groups or mixed with other plants to create a visually stunning display. When planting caladiums in garden beds, it’s important to choose a location that receives partial shade and has well-draining soil.
Nursery
If you’re looking to add caladiums to your garden, consider purchasing them from a nursery. This will ensure that you get healthy and mature plants that are ready to be planted in your garden. When selecting caladiums from a nursery, look for plants that have healthy foliage and no signs of disease or pests.
Seeds
Caladiums can also be grown from seeds, but this method requires patience and a bit of skill. Seeds should be planted in a well-draining soil mix and kept moist until they germinate. Once the seedlings have grown to a mature size, they can be transplanted into your garden.
Mature Plant
Mature caladium plants can be divided and replanted to create new plants. This is a great way to propagate your caladiums and expand your garden. When dividing mature plants, be sure to use a sharp knife and divide the plant into sections that each have at least one healthy leaf.
In summary, caladiums are a versatile and vibrant addition to any garden. Whether you’re planting them in garden beds, purchasing them from a nursery, growing them from seeds, or dividing mature plants, caladiums are sure to add beauty and color to your garden.
Conclusion
Propagating Caladium is a simple and rewarding process. With the right tools and techniques, anyone can easily grow new plants from existing ones. By following the steps outlined in this guide, gardeners can ensure that their Caladium plants thrive and continue to beautify their gardens for years to come.
One of the key takeaways from this guide is the importance of choosing the right time and method of propagation. Gardeners should take care to select healthy, mature plants, and to use clean, sharp tools when cutting or dividing them. They should also be mindful of the weather and growing conditions, and adjust their propagation techniques accordingly.
Another important consideration is the type of soil and fertilizer used. Caladium plants require well-draining soil that is rich in nutrients, and gardeners should take care to provide them with the right balance of water and fertilizer. They should also be aware of any pests or diseases that may affect their plants, and take appropriate measures to prevent or treat them.
In summary, propagating Caladium is a simple and rewarding process that can be enjoyed by gardeners of all skill levels. By following the steps outlined in this guide, gardeners can ensure that their plants thrive and continue to bring beauty and joy to their gardens for years to come.